Lab 11 - Docker
In this lab, you’re going to install Docker Engine on an instance, download and run existing containers from Docker Hub, and script application deployments using Docker Compose.
Activities
WARNING - FALL 2021
AWS Academy has a limit of 9 running instances per region, and a separate limit of 32 vCPUs running per region. In testing, it seems that if you have more than 9 instances created, the next time you click the "Start Lab" button, it will start the first 9 and TERMINATE any beyond that. WTF, AWS Academy?
Fortunately, there are several instances that we no longer need for Tiger Enterprises for the remainder of the semester. Terminate these now, and keep a close count on your total number of instances:
- Web project:
Web ServerandWeb Load Balancer - Domain project:
Domain Controller,File Server, andDesktop
Part 1 - Create Docker Server
Create a new Ubuntu server to run Docker Engine.
First, create a new Security Group for the Docker Server:
- Go into EC2 -> Network & Security -> Security Groups
- Create a new security group:
Tiger-SG-Docker-Server - VPC:
Tiger-VPC - Inbound rules:
SSHfrom sourceAnywhere-IPv4HTTPfrom sourceAnywhere-IPv4All ICMP - IPv4from sourceAnywhere-IPv4(This permits ICMP pings for network debugging)
Create a new EC2 instance at AWS meeting the following requirements:
- AMI: Latest Amazon-provided Ubuntu 20.04 image - x86_64
- Instance type: t2.small (1 vCPU, 2 GiB memory) - A slightly larger node with more RAM
- Network: “Tiger-VPC"
- Subnet: “Tiger-VPC-Public” # Select the PUBLIC subnet
- Auto-assign Public IP: Use Subnet setting (Enable)
- Storage: 8GiB with "Delete on Termination" enabled
- Tag: Name = “Docker: Ubuntu 20.04"
- Security Group: Use existing security group: “Tiger-SG-Docker-Server"
- Keypair: Existing keypair / “COMP-175-Lab-1"
Set the hostname of the instance to docker.
Assign the DNS name docker.STUDENT-NAME.tigerenterprises.org to your instance, and script it so DNS automatically updates with the current public IP address when the system boots.
Part 2 - Install Docker Engine
Docker Engine is an open source containerization technology for building and containerizing applications. Docker Engine acts as a client-server application with:
- A server with a long-running daemon process
dockerd - APIs which specify interfaces that programs can use to talk to and instruct the Docker daemon
- A command line interface (CLI) client
docker
The CLI uses Docker APIs to control or interact with the Docker daemon through scripting or direct CLI commands. The daemon creates and manages Docker objects such as images, containers, networks, and volumes.
References:
- Install Docker Engine on Ubuntu
- Post-installation steps for Linux
- Docker Engine Overview and Installation Guide
Add Docker-Specific Repository
Although the Ubuntu package library has Docker available, it's not the latest version of Docker. To access that, you need to configure the package manager to add a new repository.
First, update the apt package index and install packages to allow apt to use a repository over HTTPS
$ sudo apt update
$ sudo apt-get install \
    apt-transport-https \
    ca-certificates \
    curl \
    gnupg-agent \
    software-properties-common
Next, add Docker’s official GPG key, so that apt can verify packages as authentic:
$ curl -fsSL https://download.docker.com/linux/ubuntu/gpg | sudo apt-key add -Verify that you now have the key with the fingerprint 9DC8 5822 9FC7 DD38 854A E2D8 8D81 803C 0EBF CD88, by searching for the last 8 characters of the fingerprint.
$ sudo apt-key fingerprint 0EBFCD88

# Should see results like:
# pub   rsa4096 2017-02-22 [SCEA]
#       9DC8 5822 9FC7 DD38 854A  E2D8 8D81 803C 0EBF CD88
# uid           [ unknown] Docker Release (CE deb) <docker@docker.com>
# sub   rsa4096 2017-02-22 [S]
Finally, use the following command to set up the stable repository (in contrast to the nightly or test repositories that have more experimental and under development versions). Note: The lsb_release -cs sub-command below returns the name of your Ubuntu distribution, such as focal for Ubuntu 20.04.
$ sudo add-apt-repository \
   "deb [arch=amd64] https://download.docker.com/linux/ubuntu \
   $(lsb_release -cs) \
   stable"
Install Docker Engine from Repository
Update the apt package index, and then install the latest available stable release of Docker Engine and containerd:
 $ sudo apt update
 $ sudo apt install docker-ce docker-ce-cli containerd.io
Verify that Docker Engine is installed correctly by checking its version number. Then, download and run the hello-world test image from Docker Hub. When that container runs, it prints an informational message and exits.
$ sudo docker --version
# Should see:
# Docker version 20.10.9, build c2ea9bc
$ sudo docker run hello-world
At this point, Docker Engine is installed and running. The docker group is created but no users are added to it. You need to use sudo to run Docker commands.
Deliverables:
- Submit a screenshot of the Docker version number and the
Hello-Worldcontainer running on your Docker server (both invoked with asudocommand.)
Add Authorized Users to Docker Group
The Docker daemon binds to a Unix socket instead of a TCP port. By default that Unix socket is owned by the user root and other users can only access it using sudo. The Docker daemon always runs as the root user.
To avoid having to use sudo every time you issue a Docker command, create a Unix group called docker and add users to it. When the Docker daemon starts, it creates a Unix socket accessible by members of the docker group.
Create the docker group:
$ sudo groupadd docker
# Might already exist (from package installer)
Add your current user to the docker group:
$ sudo usermod -aG docker $USERLog out and log back in so that your group membership is re-evaluated. Or, run newgrp docker to active the changes to groups immediately.
Finally, verify that you can run docker commands without sudo:
$ docker --version
$ docker run hello-world
This command downloads a test image and runs it in a container. When the container runs, it prints an informational message and exits.
Deliverables:
- Submit a screenshot of the Docker version number and the
Hello-Worldcontainer running on your Docker server (both invoked without asudocommand.)
Configure Docker Engine to Start On Boot
The systemd daemon manages the services that start when the system boots. Enable docker to start automatically.
$ sudo systemctl enable dockerPart 3 - Container: Install and Configure MySQL
MySQL is a popular open source database, currently developed by Oracle. A current version of MySQL is available as a pre-built Docker container at DockerHub: MySQL. Download, configure, and run this container.
First, pull the official image from DockerHub:
$ docker pull mysqlNext, run the instance. The docker run command has many potential arguments and options to set.
$ docker run --name="MySQL" \
--network="bridge" \
--mount='type=volume,src=db,dst=/var/lib/mysql' \
-e MYSQL_ROOT_PASSWORD="my-secret-pw" \
-e MYSQL_DATABASE="wordpress" \
-e MYSQL_USER="TigerWordpressUser" \
-e MYSQL_PASSWORD="TigerWordpressPassword" \
-d \
mysql:latest--name- Option can specify a human-friendly name to identify the container. Otherwise, a UUID is assigned--network- Specify the container network mode (bridge, container, host, or a user-defined network)--mount- Specify how to mount storage that persists after the container shuts down. See Docker Reference: Volumestarget- Volumesrc- Source of volume in the host. In this case, the name of the volume:dbdst- Destination of volume in the container. In this case, the volume is mounted in the container at/var/lib/mysql
-e- Set some container-specific environment variables that affect the setup the container runs when it is first booted. In this case:MYSQL_ROOT_PASSWORD="my-secret-pw"- Set the database root password to a value of your choiceMYSQL_DATABASE="wordpress"- Specify name of database to be created upon startupMYSQL_USER="TigerWordpressUser"- Specify username to be created upon startupMYSQL_PASSWORD="TigerWordpressPassword"- Specify password (of user above) to be created upon startup
-d- Run in detached mode so that the container continues to run even if the current user (that invoked the container) logs off- Start the container from the
mysqlimage that was previously pulled. (In this case, the taglatestis added, as the image has multiple versions available for use).
To find the (internal Docker) IP address assigned to the MySQL image, use the docker inspect command, with some built-in features to parse the JSON file that would otherwise be output. You'll need this in the next part, when you tell WordPress where to reach the database server across the network.
$ docker inspect -f "{{ .NetworkSettings.IPAddress }}" MySQLPart 4 - Container: Install and Configure WordPress
WordPress is an open-source content management system for website creation. A current version of WordPress is available as a pre-built Docker container at DockerHub: Wordress. Download, configure, and run this container.
First, pull the official image from DockerHub:
$ docker pull wordpressNext, run the instance. The docker run command has many potential arguments and options to set.
$ docker run --name="WordPress" \
--network="bridge" \
-p 80:80 \
--mount='type=volume,src=wordpress,dst=/var/www/html' \
-e WORDPRESS_DB_HOST="172.17.0.2" \
-e WORDPRESS_DB_USER=TigerWordpressUser \
-e WORDPRESS_DB_PASSWORD=TigerWordpressPassword \
-e WORDPRESS_DB_NAME=wordpress \
-e WORDPRESS_DEBUG=1 \
-d \
wordpress--name- Option can specify a human-friendly name to identify the container. Otherwise, a UUID is assigned--network- Specify the container network mode (bridge, container, host, or a user-defined network)--mount- Specify how to mount storage that persists after the container shuts down. See Docker Reference: Volumestarget- Volumesrc- Source of volume in the host. In this case, the name of the volume:wordpressdst- Destination of volume in the container. In this case, the volume is mounted in the container at/var/www/html
-p- "Publish" container network ports to host network ports. The syntax ishostPort:containerPort. In this case, port 80 on the host will be forwarded to port 80 on the container, allowing the web server in the container to be externally accessible.-e- Set some container-specific environment variables. In this case:WORDPRESS_DB_HOST="172.16.0.2"- Specify hostname or IP address of database serverWORDPRESS_DB_USER=TigerWordpressUser- Specify username with access to databaseWORDPRESS_DB_PASSWORD=TigerWordpressPassword- Specify password of userWORDPRESS_DB_NAME=wordpress- Specify name of database (on server)WORDPRESS_DEBUG=1- Launch WordPress in a debug mode in case troubleshooting is needed
-d- Run in detached mode so that the container continues to run even if the current user (that invoked the container) logs off- Start the container from the
wordpressimage that was previously pulled.
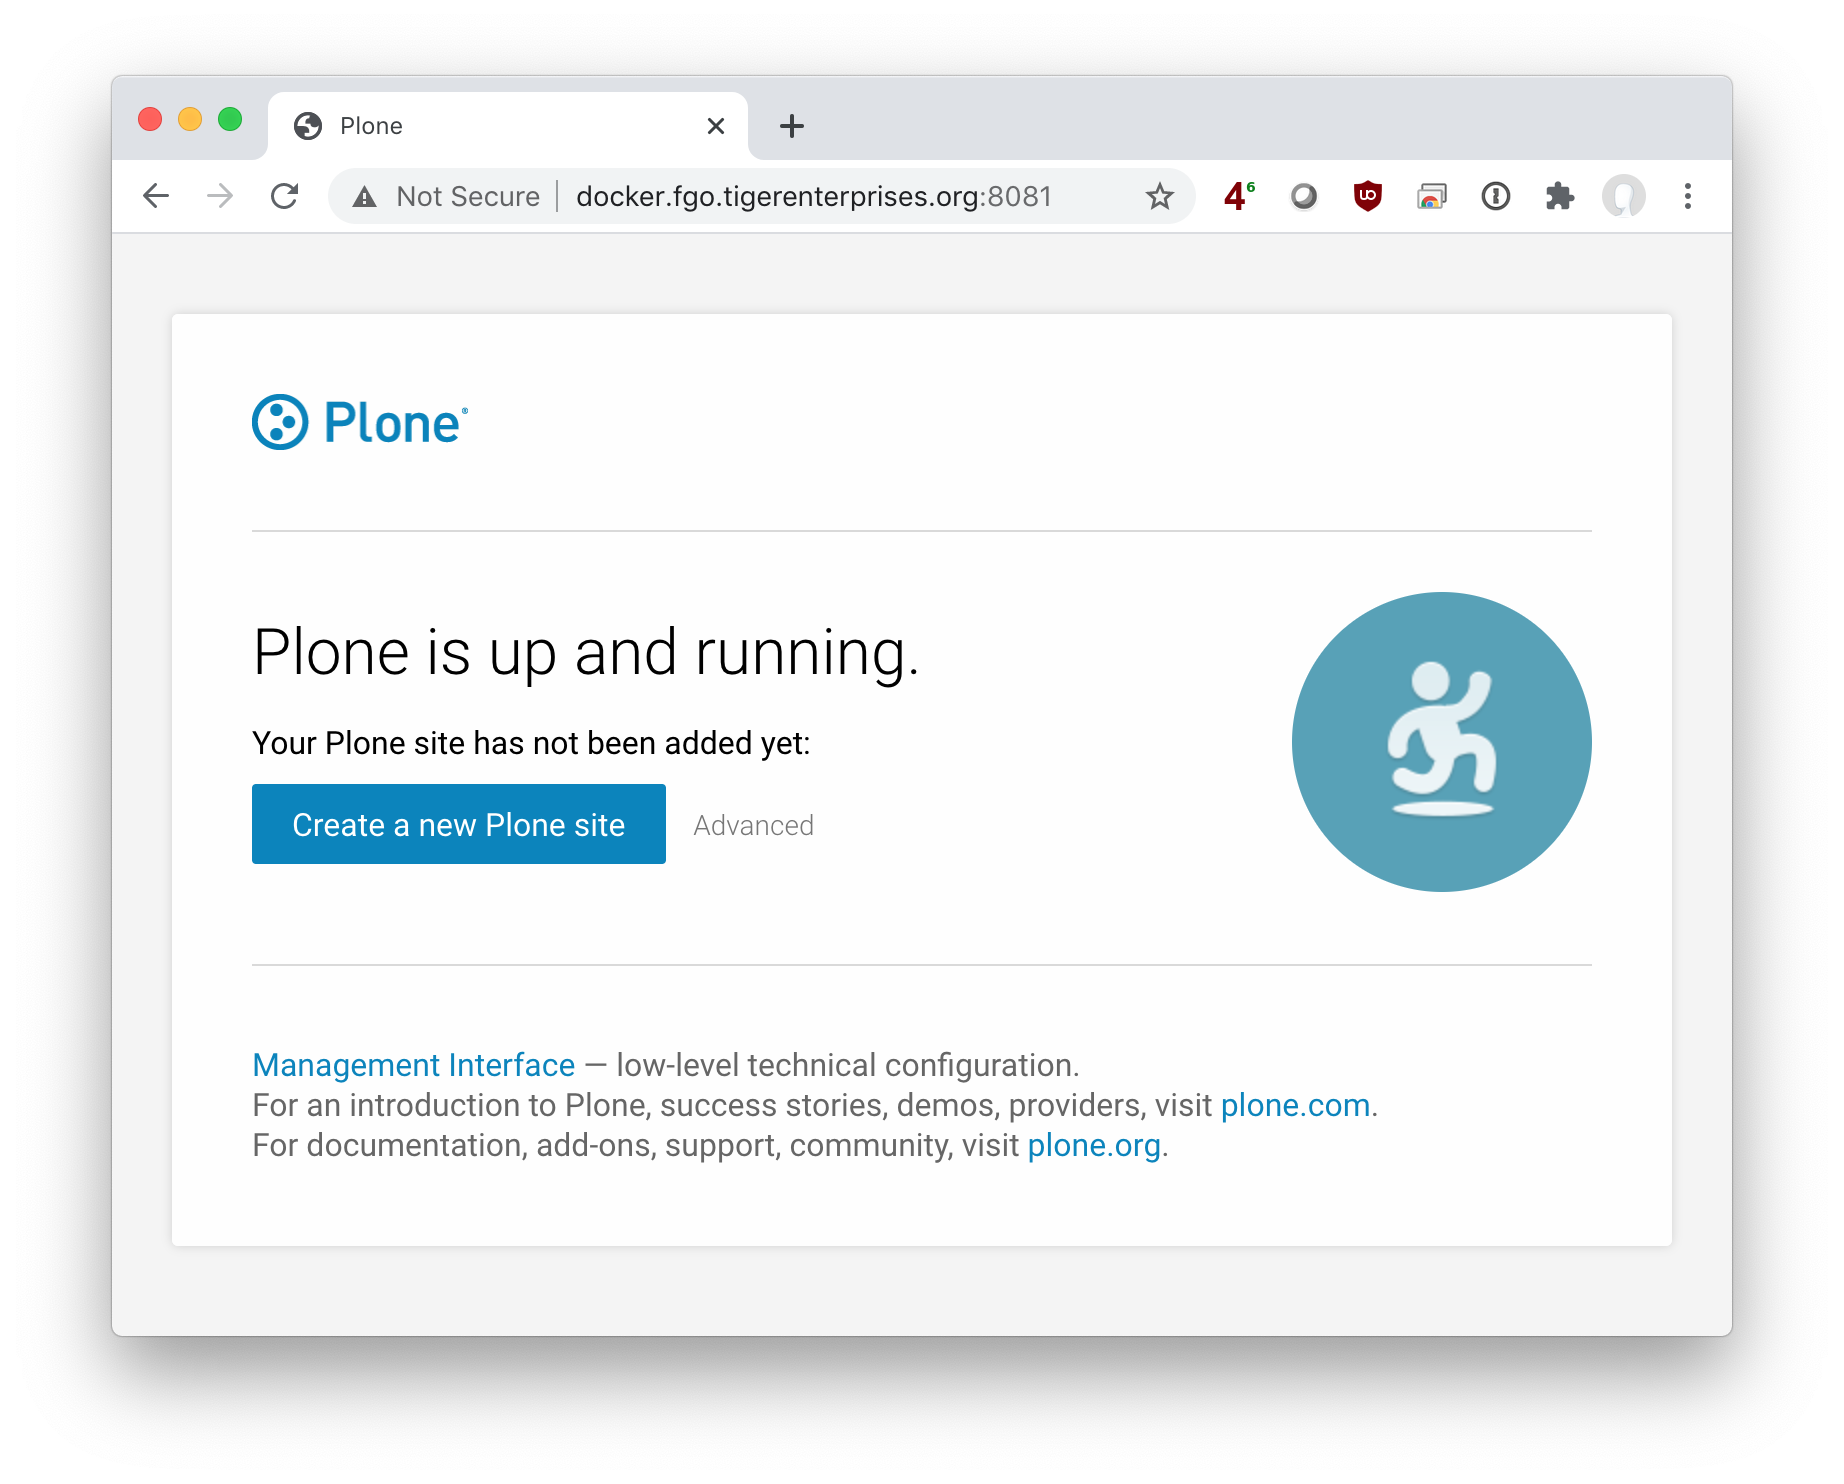
 Access your new WordPress CMS from your web browser at
 http://docker.STUDENT-NAME.tigerenterprises.org. Your first screen should look like this. Step through the Docker setup (choosing a username and password, entering your email address, etc). in order to reach the main administrator dashboard page.
Complete the deliverables listed below. When finished with this section, stop your WordPress and MySQL containers with docker stop MySQL WordPress
Troubleshooting
- Does DNS resolve
http://docker.STUDENT-NAME.tigerenterprises.orgto the public IP of your docker server? - Is port 80 open on the inbound AWS security group for the docker server?
- Are both the wordpress and mysql containers running? See monitoring commands below.
- Does the wordpress container have port 80 forwarded to it? See monitoring commands below.
Deliverables:
- Submit a screenshot of the WordPress CMS at the main admin dashboard accessible over the web at the URL
http://docker.STUDENT-NAME.tigerenterprises.org. - Submit a screenshot of
(a) the list of running Docker containers,
(b) the port mapping for the WordPress container, and
(c) the docker volumes on the host system.
To monitor your running Docker containers, you can use the Docker CLI:
| Description | Command | Reference |
|---|---|---|
| Get a list of running containers | docker container ls |
Docker Reference: Container ls |
| Get a list of all containers | docker container ls --all |
|
| Get detailed information on a specific container | docker container inspect CONTAINER [CONTAINER] |
Docker Reference: Container Inspect |
| Get resource usage statistics on running containers | docker container stats |
Docker Reference: Container Stats |
| Display the running processes of a container | docker top CONTAINER |
Docker Reference: Top |
| Get port mappings for a specific container | docker port CONTAINER |
Docker Reference: Port |
| Pause all running processes within one or more containers | docker pause CONTAINER [CONTAINER] (and docker unpause CONTAINER to resume) |
Docker Reference: Pause |
| Stop one or more containers | docker stop CONTAINER [CONTAINER] |
Docker Reference: Stop |
| Remove a stopped container | docker rm CONTAINER |
Docker Reference: rm |
| Display volumes | docker volume ls |
Docker Reference: Volume ls |
| Display system-wide information | docker system info |
Docker Reference: System Info |
| Display available Docker images on local system (that have been pulled from Docker hub or manually loaded) |
docker images |
Docker Reference: Images |
| Display available Docker images on local system (matching a specific name and/or tag) |
docker images NAME:TAG |
|
| Get an interactive shell on a running container | docker exec -it CONTAINER /bin/bash |
Docker Reference: exec |
Part 5 - Create Docker Compose Deployment Script
While creating docker containers at the command line certainly works, it's not the most maintainable process at scale, particularly when multiple containers need to be launched together to accomplish some larger purpose. Docker Compose allows you to define an application stack that can deploy multiple containers at once.
References:
First, install Docker Compose:
# Download script from GitHub
$ sudo curl -L "https://github.com/docker/compose/releases/download/1.29.2/docker-compose-$(uname -s)-$(uname -m)" -o /usr/local/bin/docker-compose

# Mark it as executable
$ sudo chmod +x /usr/local/bin/docker-compose

# Test that it works
$ docker-compose --version
# Should see:
# docker-compose version 1.29.2, build 5becea4c
Create a new file on disk to specify your new software stack. By convention, this file is always named docker-compose.yml.
$ nano docker-compose.ymlIn it, put the following YAML-formatted specification:
version: '3.8'

services:

  db:
    image: mysql:latest
    restart: always
    environment:
      MYSQL_DATABASE: wordpress
      MYSQL_USER: TigerWordpressUser
      MYSQL_PASSWORD: TigerWordpressPassword
      MYSQL_RANDOM_ROOT_PASSWORD: '1'
    volumes:
      - db:/var/lib/mysql

  wordpress:
    image: wordpress
    depends_on:
      - db
    restart: always
    ports:
      - "80:80"
    environment:
      WORDPRESS_DB_HOST: db:3306
      WORDPRESS_DB_USER: TigerWordpressUser
      WORDPRESS_DB_PASSWORD: TigerWordpressPassword
      WORDPRESS_DB_NAME: wordpress
    volumes:
      - wordpress:/var/www/html

volumes:
  wordpress: {}
  db: {}
Run this combined software stack:
$ docker-compose up -d
# -f = YAML file to use
# -d = Detached mode (containers run in background)
You can verify that your software stack is running by accessing WordPress at http://docker.STUDENT-NAME.tigerenterprises.org. Note that you are back at the setup wizard again! Remember that all wordpress containers are stateless and that their data has to be saved in a Docker volume. Your Docker Compose script has created a new volume, distinct from the previous volumes that were used. Hence, WordPress is back at its initial configuration.
Deliverables:
- Submit a screenshot of
docker container lslisting the two running containers just created by thedocker-compose upcommand. - Submit a screenshot of
docker volume lslisting all the storage volumes. You should at least see the two original volumes you manually created (dbandwordpress), as well as the volumes that Docker Compose created as part of your application stack (ubuntu_dbandubuntu_wordpress).
When finished, stop your WordPress and MySQL containers with docker-compose down.
Part 6 - Container: Install and Configure Plone CMS
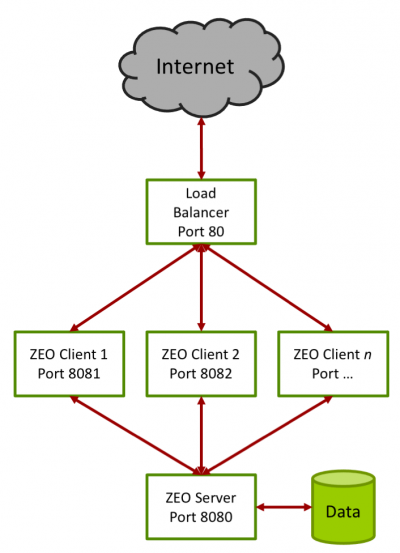 Plone is an open source content management system for website creation. The architecture of the Plone site is as follows. There is a "ZEO server" application that serves as a centralized datastore, and then multiple "ZEO clients" that serve as redundant web servers in front of the datastore. In a production environment, there would then be a load balancer in front of the ZEO clients, much as we created with NGINX in an earlier lab.
References:
- Installing Plone: The Stack
- Installing Plone on Docker
- Note that this section is somewhat hapazard, but may provide useful hints as you base your new Docker Compose script off of the example above
In Part 6, create a Docker Compose YAML script to deploy Plone onto your server using the image provided at Docker Hub: Plone. Your script should create the following architecture:
- There should be one container for the ZEO server -
zeo- To function as a ZEO server, the docker container should be started with the command
zeo - The directory
/datainside the container should be stored to a Docker volume. This is the website data! (A centralized datastore managed by the ZEO application)
- To function as a ZEO server, the docker container should be started with the command
- There should be two containers of ZEO clients -
instance1andinstance2- Each container listens on port
8080internally but should be mapped to port8081and8082externally to avoid conflict - Each container depends on
zeoto start first - Each container should set the environment variable
ZEO_ADDRESSto the zeo server, port8080. This will make the instance function as a ZEO client, reliant on the ZEO server and its datastore.
- Each container listens on port
Note: We are not bothering to configure a load balancer today. So, your new site will be both accessible at port 8081 (communicating with instance1) and port 8082 (communicating with instance2), and each instance is pulling from the same data.
Follow these steps:
- Pull the Plone image from Docker Hub
- Create a
docker-compose.ymlfile that meets the specifications above. Place this file in a subdirectory (e.g.,plone_site) to avoid confusion with the file you previously created - Run
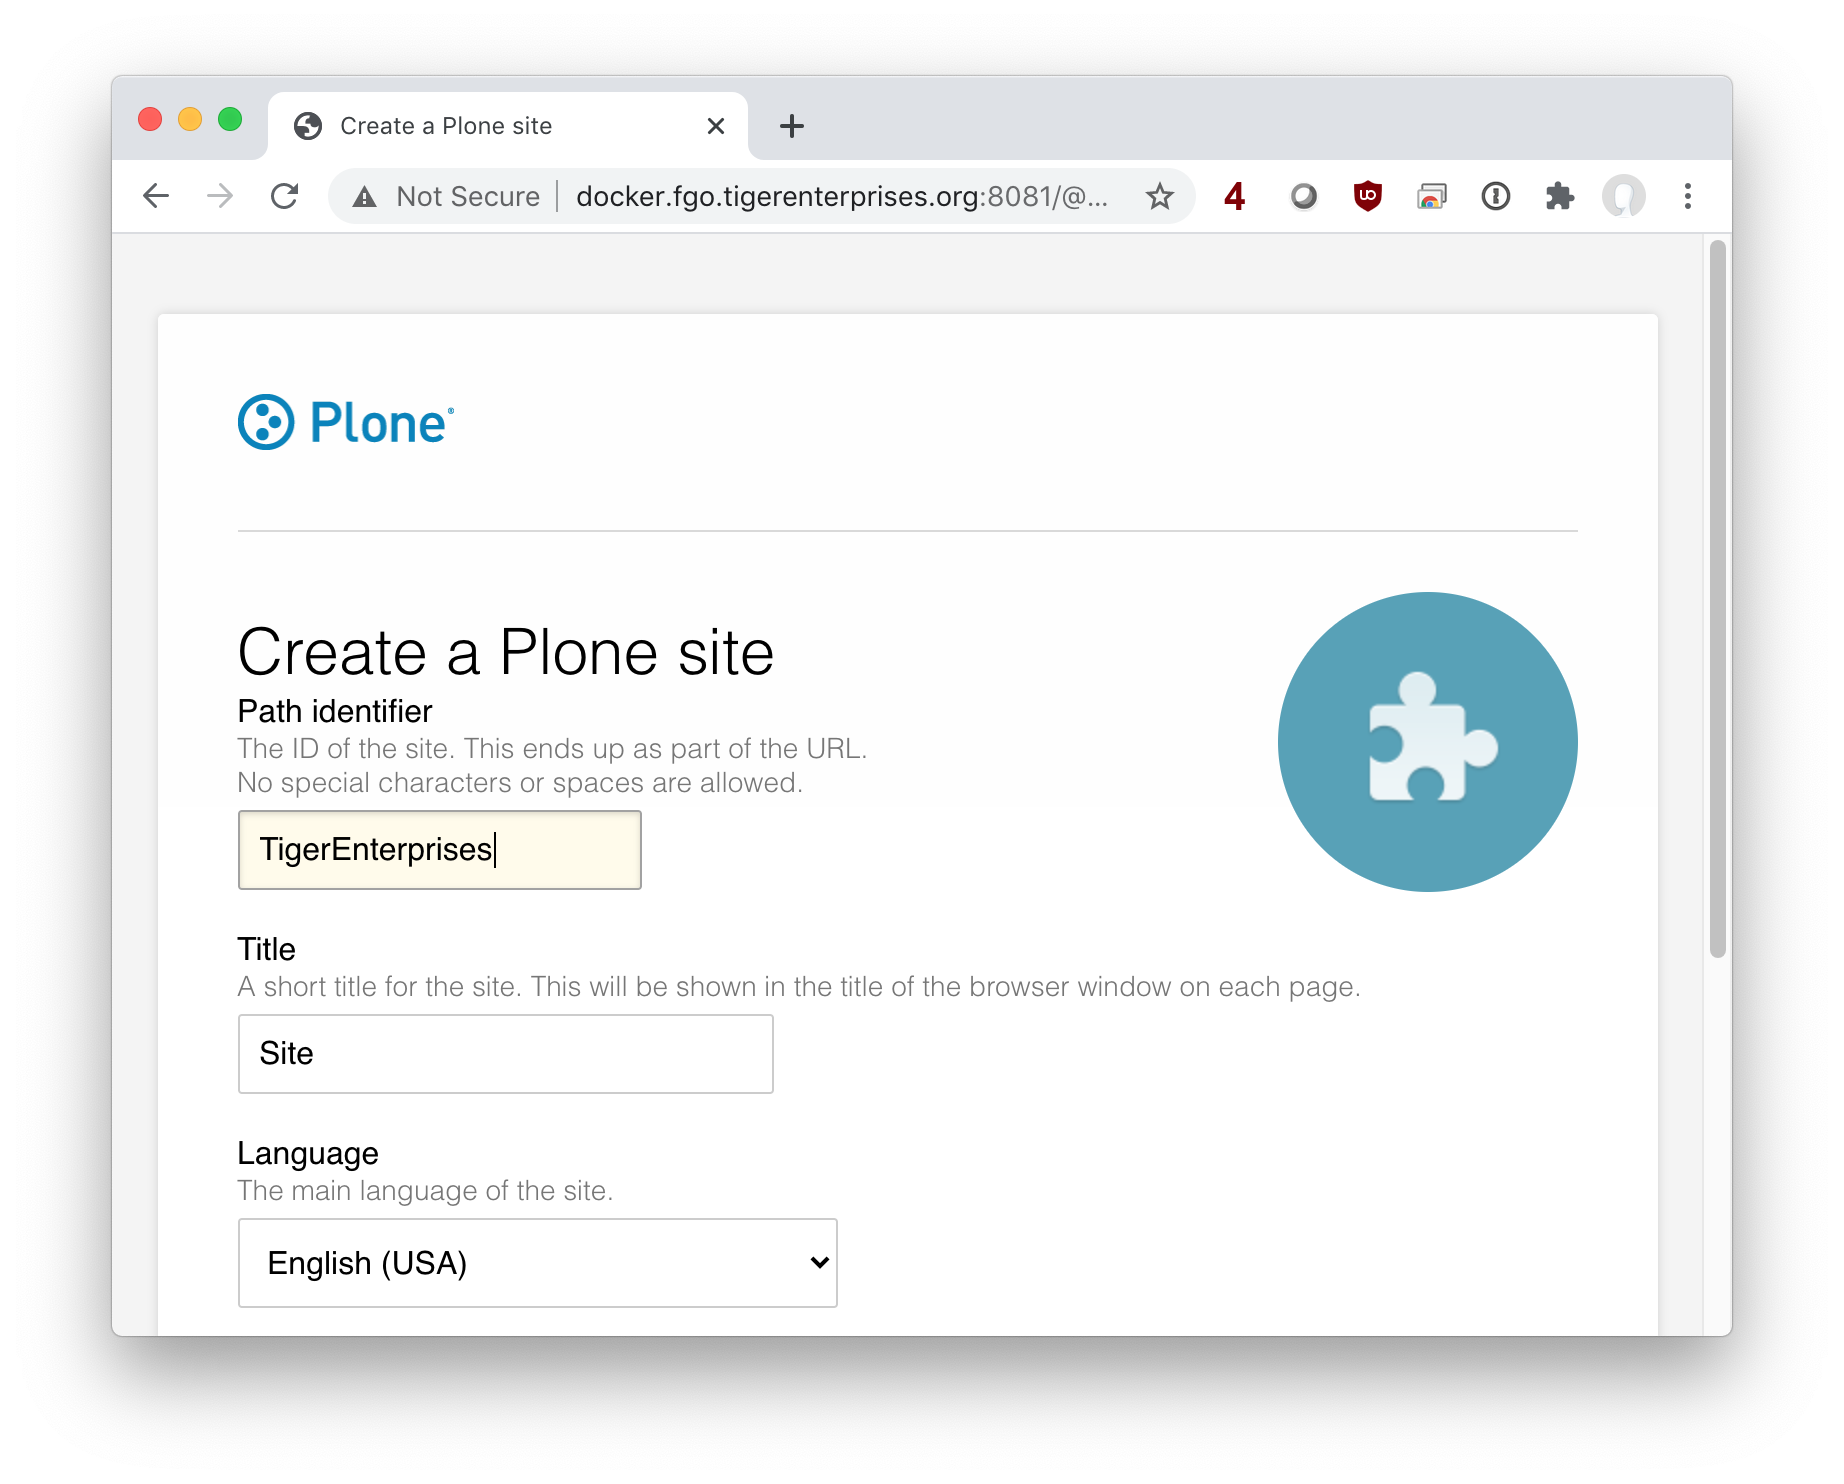
docker-composeto create your containers - Log onto your new Plone website as seen on
instance1at http://docker.STUDENT-NAME.tigerenterprises.org:8081. Tip: Do you need to do something with security groups? - Follow the prompt to create a new Plone site
- Enter the default admin credentials of
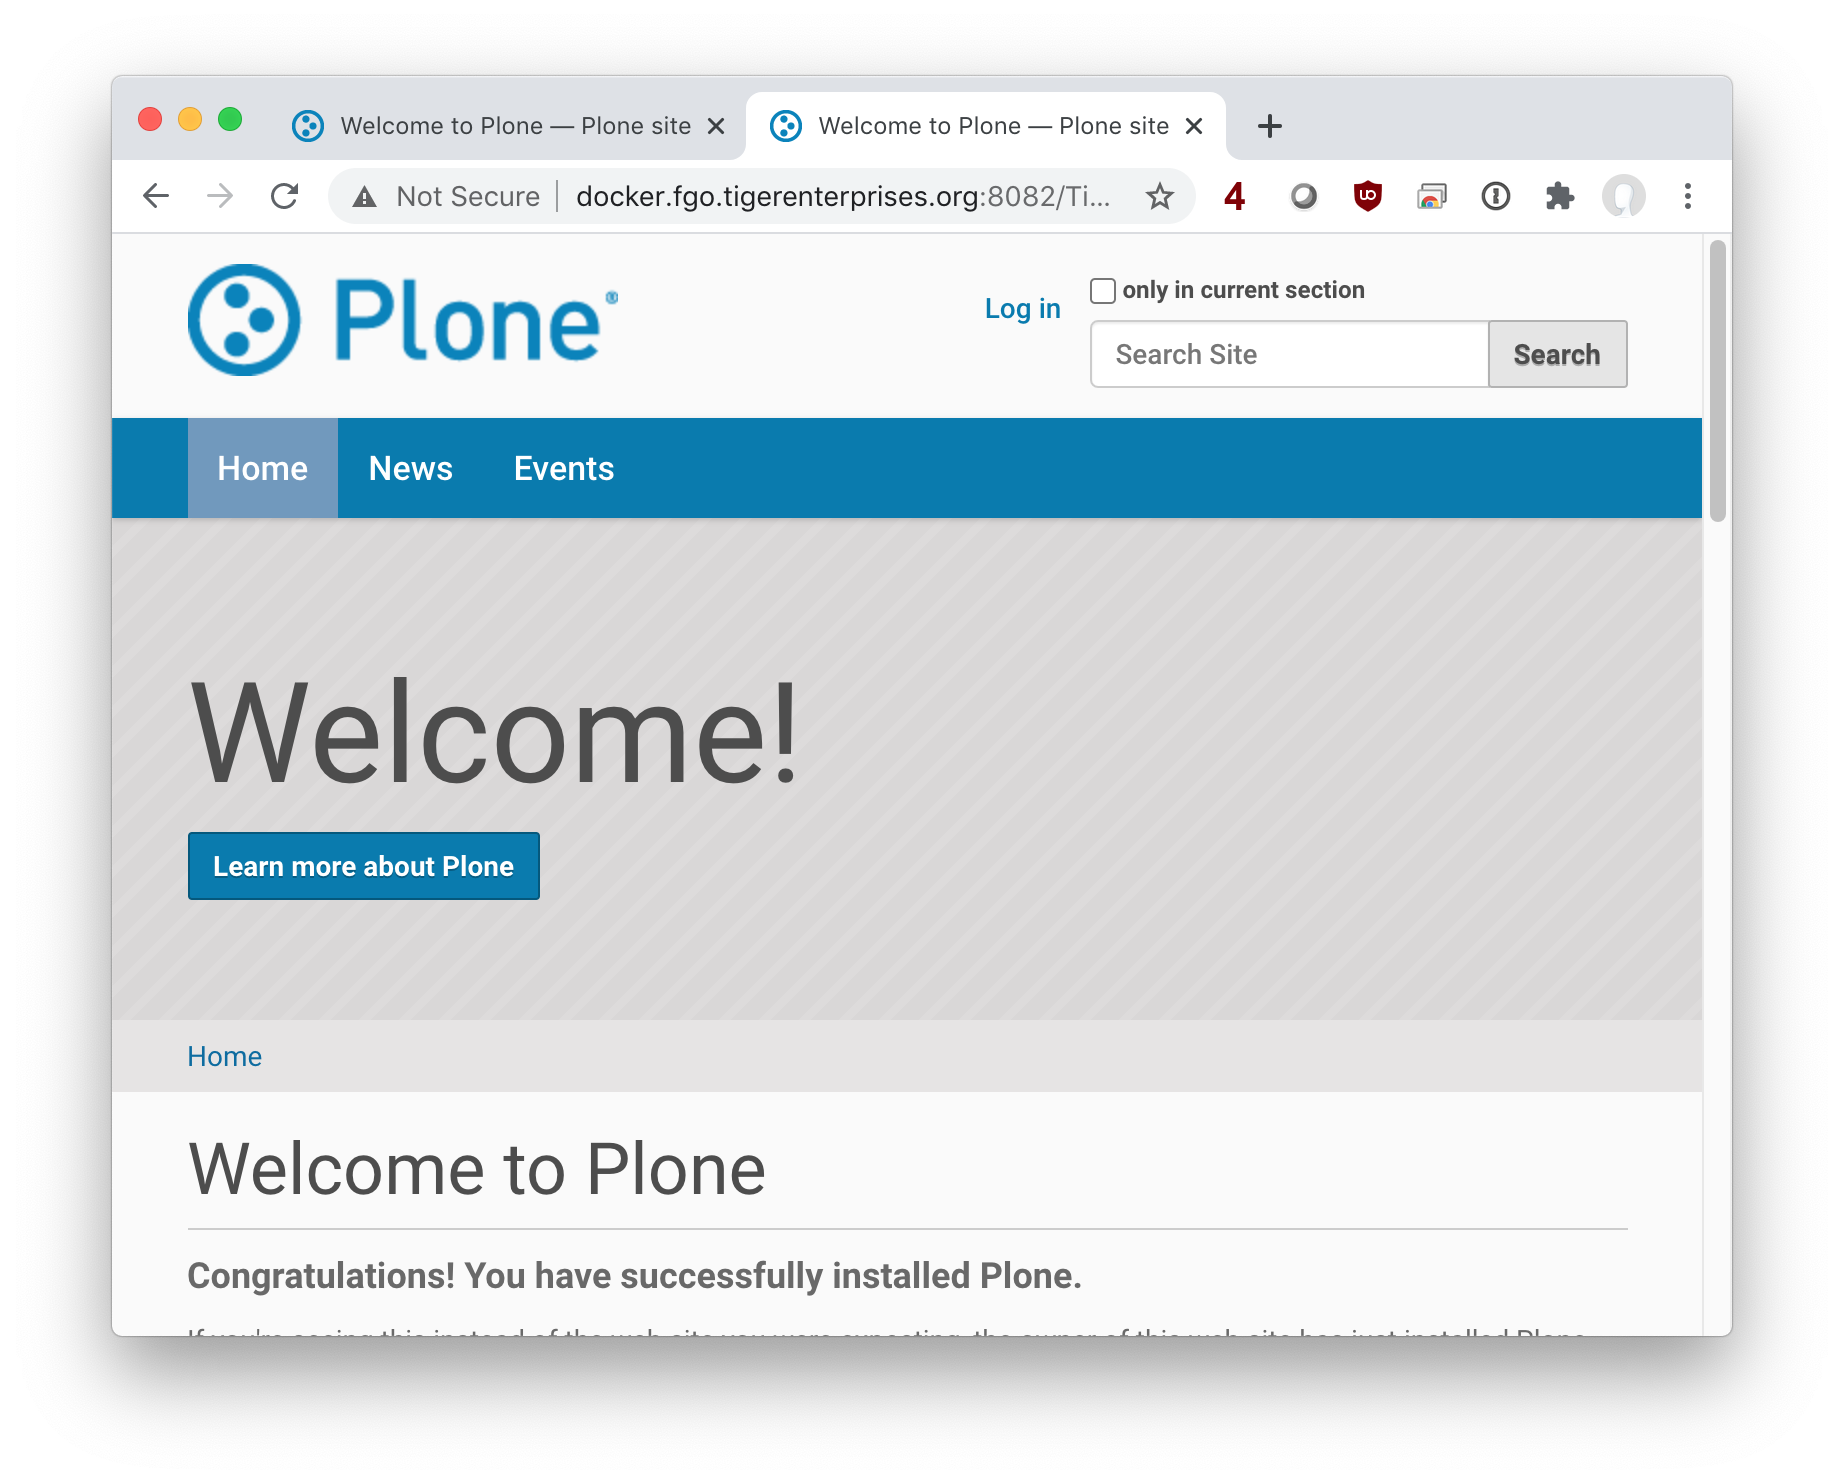
admin/admin - After creating your new site, view it from the other instance (http://docker.STUDENT-NAME.tigerenterprises.org:8082) to confirm that you have two instances accessing the same ZEO data store.
Tip: Having syntax errors with your YAML file? Use an online YAML checker to help verify your syntax before testing.
Deliverables:
- Upload your
docker-compose.ymlfile for the Plone site - Submit a screenshot of
docker container lsshowing your three running containers (1 ZEO server + 2 ZEO clients) - Submit a screenshot of your new Plone website accessible from
http://docker.STUDENT-NAME.tigerenterprises.org:8082
When finished, stop your Plone containers with docker-compose down.

Lab Deliverables
After submitting the Canvas assignment, you should STOP your virtual machines, not terminate them. We'll use them again in future labs, and thus want to save the configuration and OS data.
Upload to the Lab 11 Canvas assignment all the lab deliverables to demonstrate your work:
- Part 2 - Install Docker Engine
- Submit a screenshot of the Docker version number and the
Hello-Worldcontainer running on your Docker server (both invoked with asudocommand.) - Submit a screenshot of the Docker version number and the
Hello-Worldcontainer running on your Docker server (both invoked without asudocommand.)
- Submit a screenshot of the Docker version number and the
- Part 4 - Container: Install and Configure WordPress
- Submit a screenshot of the WordPress CMS at the main admin dashboard accessible over the web at the URL
http://docker.STUDENT-NAME.tigerenterprises.org. - Submit a screenshot of (a) the list of running Docker containers, (b) the port mapping for the WordPress container, and (c) the docker volumes on the host system.
- Submit a screenshot of the WordPress CMS at the main admin dashboard accessible over the web at the URL
- Part 5 - Create Docker Stack Deployment Script
- Submit a screenshot of
docker container lslisting the two running containers just created by thedocker-compose upcommand. - Submit a screenshot of
docker volume lslisting all the storage volumes on disk.
- Submit a screenshot of
- Part 6 - Container: Install and Configure Plone CMS
- Upload your
docker-compose.ymlfile for the Plone site - Submit a screenshot of
docker container lsshowing your three running containers (1 ZEO server + 2 ZEO clients) - Submit a screenshot of your new Plone website accessible from
http://docker.STUDENT-NAME.tigerenterprises.org:8082
- Upload your